 squido blog
Build a static Blog for free using AWS Amplify in under 10mins
Getting started
Things you will need:
- Git installed.
- Node.js installed.
- A text editor, like Visual Studio Code.
Open your Terminal and install squido globally:
# npm i -g https://github.com/mrvautin/squido.git
Speed things up by cloning the example blog Git repository:
# git clone https://github.com/mrvautin/squido-blog-example my-blog
Building
Enter your new blog directory:
# cd my-blog
Build your blog:
Note: The serve command creates a local web server to view your new blog. The -b flag is to build, the -w is to watch for changes and rebuild if needed and the -c flag is to clean old files.
# squido serve -b -w -c
You can now view your blog by opening the following URL in a browser:
http://localhost:4965
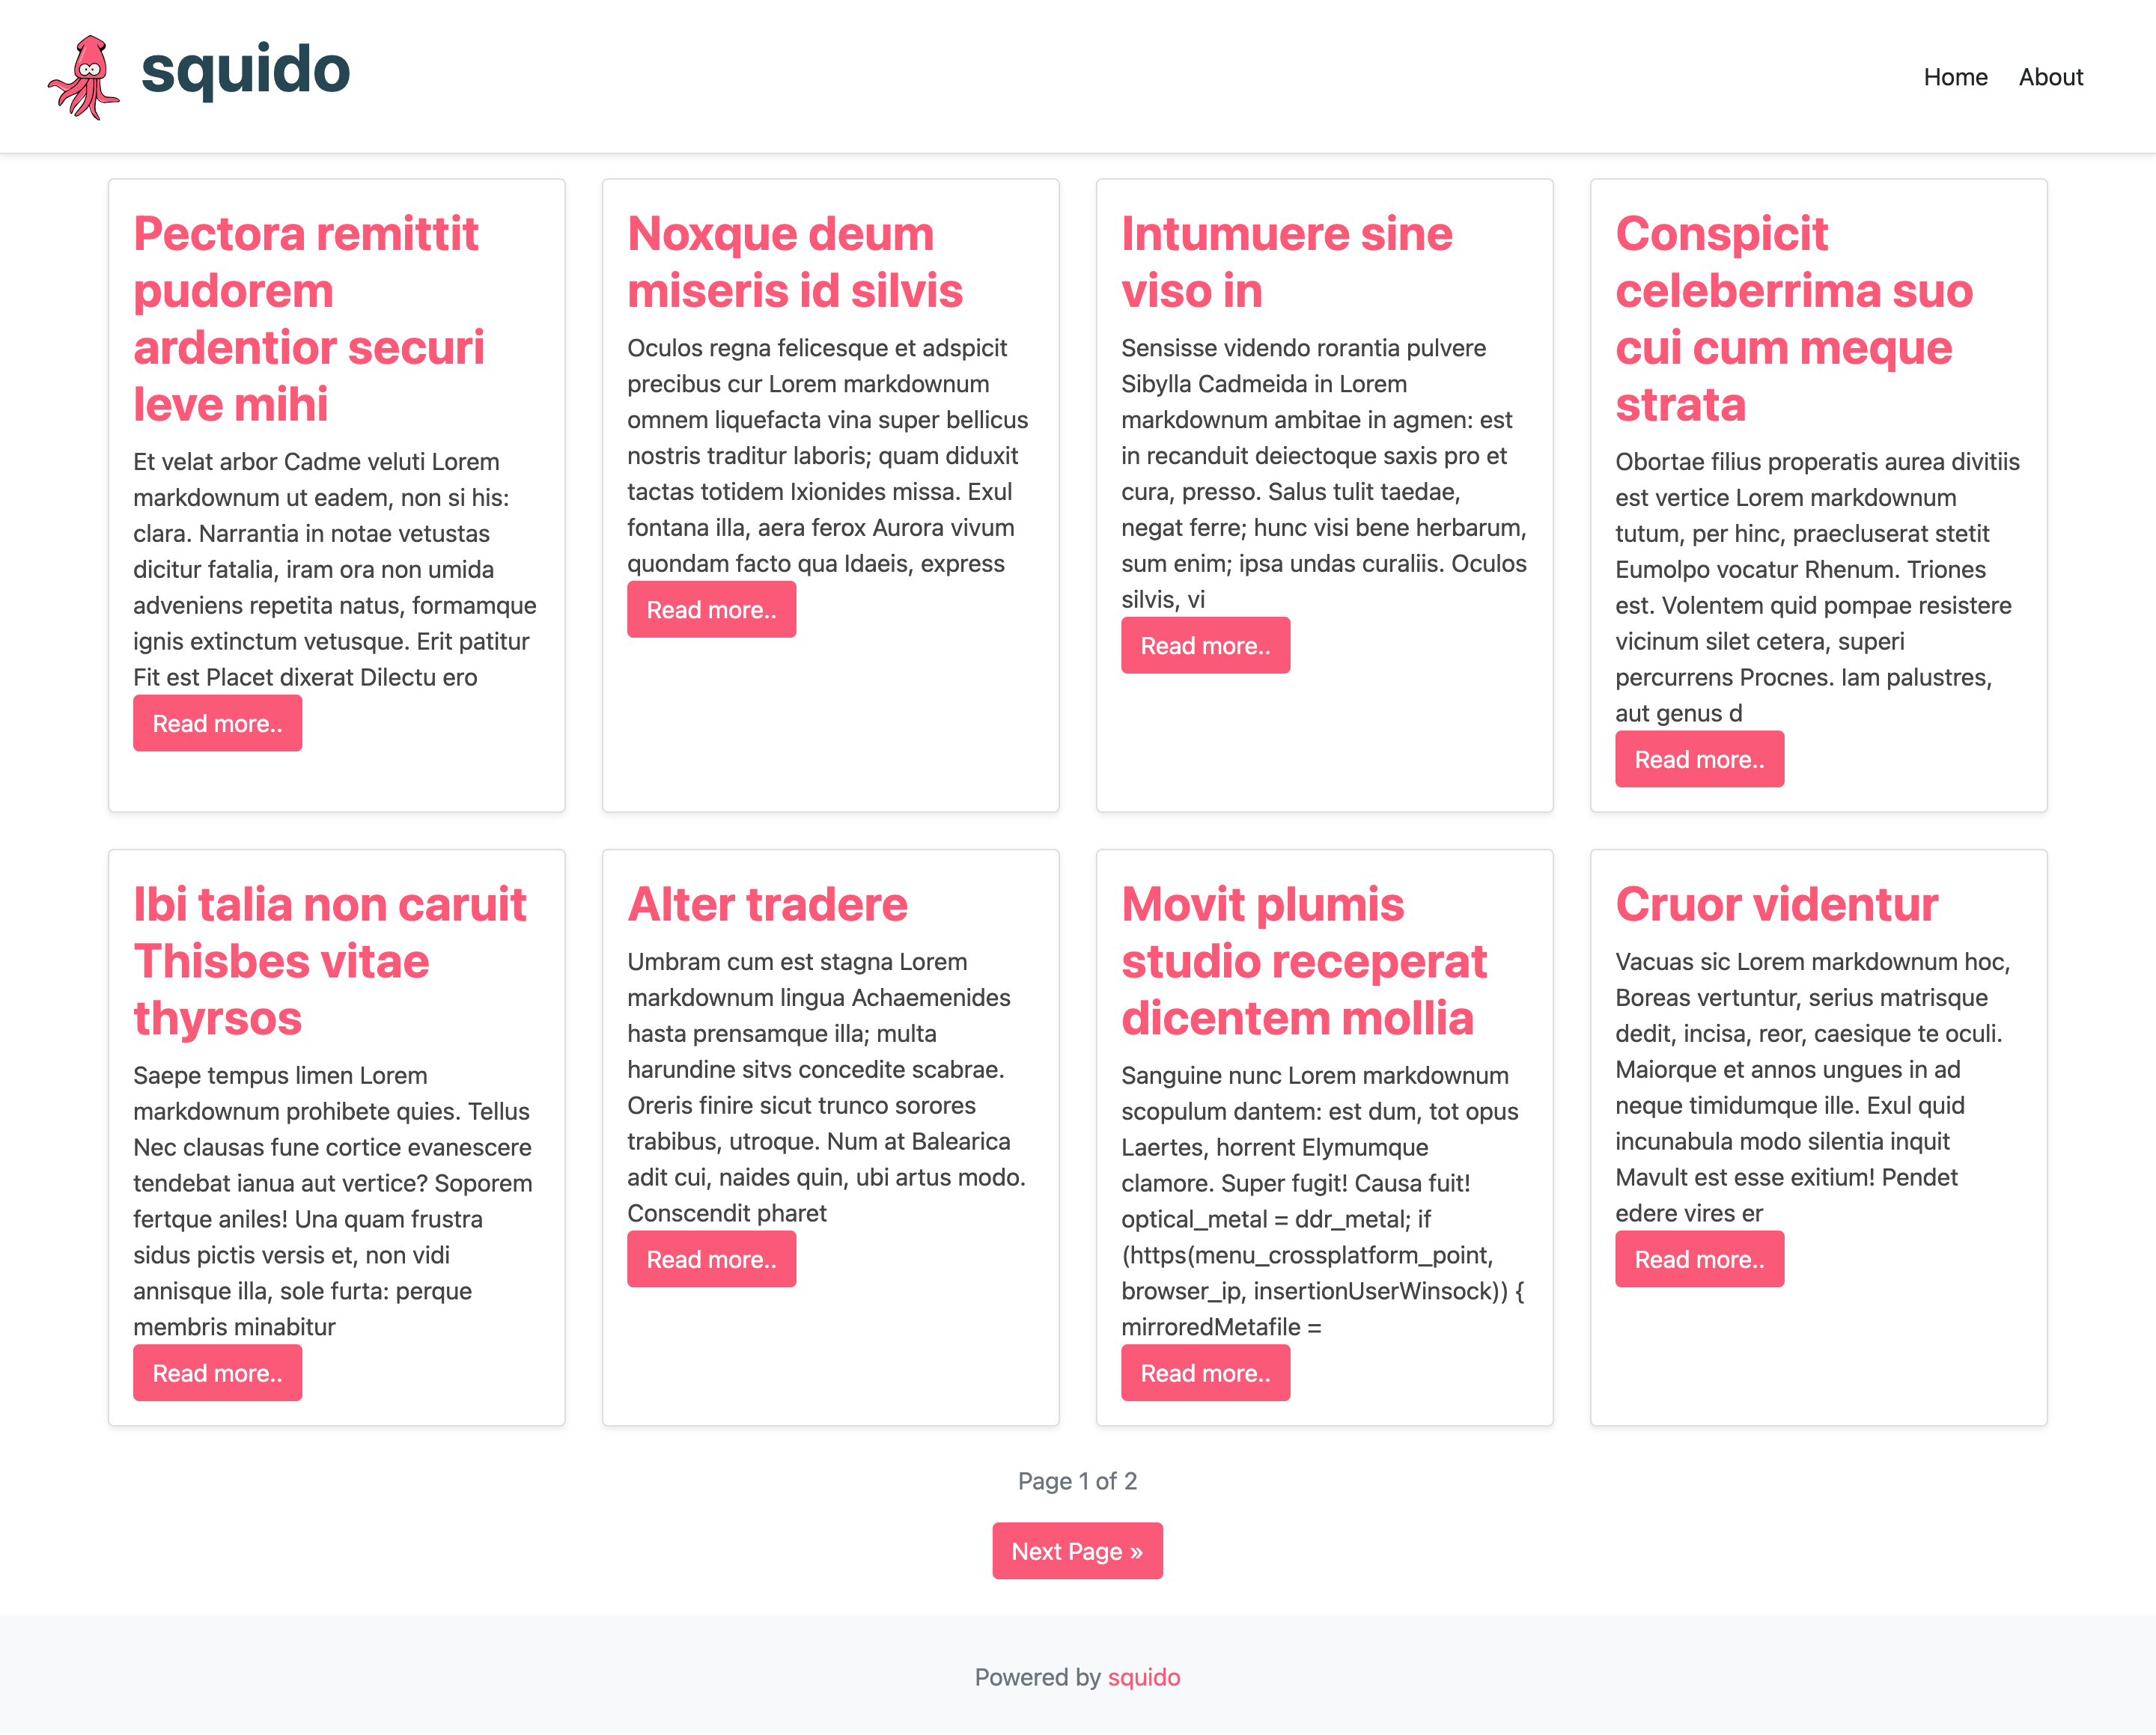
You should see:
Deploy to AWS Amplify
- Sign in to Amplify using your AWS account here
- Select
Getting started - Select
Host your web appby clicking the correspondingGetting startedbutton - You can then select to link a Git provider. We are going full simple and selecting
Deploy without Git provider - Enter an
App nameand set anEnvironment namelike this:
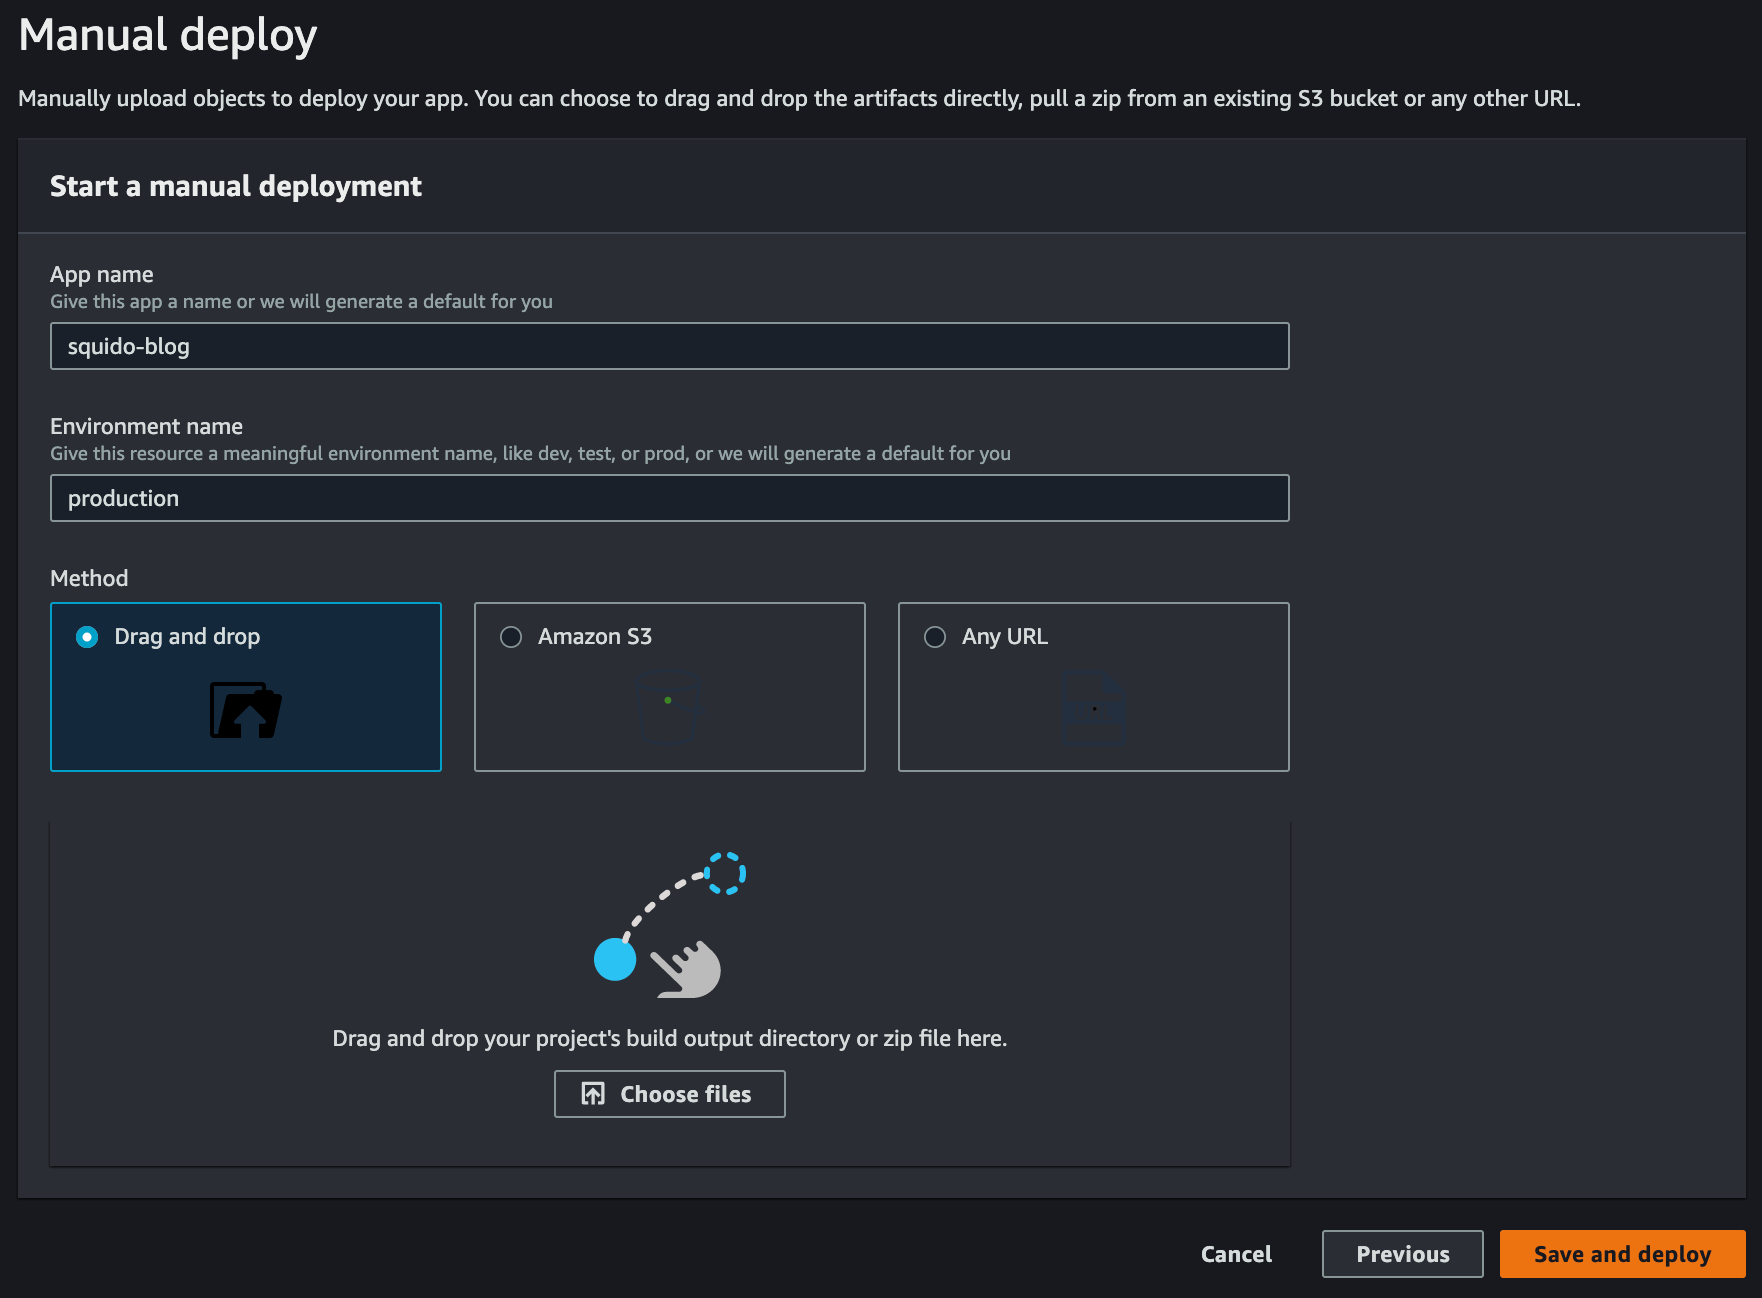
- In the build steps above a Zip was created here:
/build/build.zip. We are going to upload thebuild.zipfile to AWS Amplify by clickingSelect fileand browsing to it and selecting it. - Click
Save and deploy - Wait for your website to be deployed. Once complete you can browse to your website by opening the
Domain.

- You can then setup a custom domain by selecting
Domain managementfrom the left menu and following the steps
Thats it! A blog hosted on AWS Amplify for free with such little effort. Enjoy!
For more information on setting up and customising your blog, see the squido documentation.